
Hi. Since you are here, why don't I introduce you to one of my most demanding design projects, a DIY cubesat mission, dubbed Project Shadow Flight. This is a hobby project I decided to tackle and get done in less than one year, (by the time of this writing, I am midway through the year). I know, most if not all satellite projects take time, and I mean 2 years plus. So what’s so special about this one? I guess the urge to satisfy the dopamine hit of completing a project successfully.
The goal was simple (so i thought): design a very basic 1U cubesat for EO (earth observation) using COTS (commercial off the shelf ) components. These components are not designed to be radiation hardened so as to balance the cost-functional aspect of the project. A future article will discuss how I balance cost and complexity.
Inspiration
Even though the details are murky, I remember one day doom-browsing on satellites and space tech when I came across an open source real-time OS called RTEMS (Real-Time Executive for Multiprocessor Systems), (https://www.rtems.org/) whose Wiki page describes it as supporting open standard application programming such as POSIX.
Now, the best way I use to learn anything technical is to start from the application side. And the RTEMS page shows that this OS has been used on some very impressive and cool projects ranging from Robots to Space. You can check them out here (https://www.rtems.org/applications/). I have to say these are some of the most impressive projects I have so far seen public!
Moving on, who doesn’t love a challenge. I decided to take on RTEMS and develop a simple cubesat employing this newfound OS, to simply satisfy my curiosity on space systems, mission softwares and space project design in general.
The primary mission for this cubesat is Earth Observation (EO). It will capture images over a given area, depending on the received mission from the ground station. These images are then compressed, stored and transmitted back to ground when in the TRANSMIT_TO_GROUND state. No image processing is done on board the Cubesat so as to save battery power and processing power for other critical tasks.
When the rubber meets the road
Now, saying you will do one thing and actually doing are two entirely different things. My initial plan was to use a Raspberry Pi Model 4 I have lying around to build RTEMS onto it and then the rest would be a piece of cake, right? Wrong. My first intro video on project shadow flight says that I intended to use RTEMS. Video link (https://youtu.be/7wVjAe9cGFM?list=PLSQRKAY5h7mGCnkXsugdVSHa72dnC0zQU) - excuse the audio. But in reality I realized that my skill level did not permit me to learn that fast and actually build a functional cubesat in LESS THAN ONE YEAR using a completely new architecture.
Fallback
I had overestimated my skill and resource level, so I fell back to using FreeRTOS and an STM32 architecture.( I will discuss the set up and architecture selection in a future post). This became my fallback because I am pretty comfortable with STM32 and FreeRTOS systems. Plus thinking about it I wanted something that would be neither too complex nor too trivial. So the ground was set - STM32+FreeRTOS for the firmware, the hardware selection is another ball game.
A word of wisdom, gauge your capability first from the beginning before committing fully otherwise you will suffer good down the line.
This image shows my very first sketch out of mind.
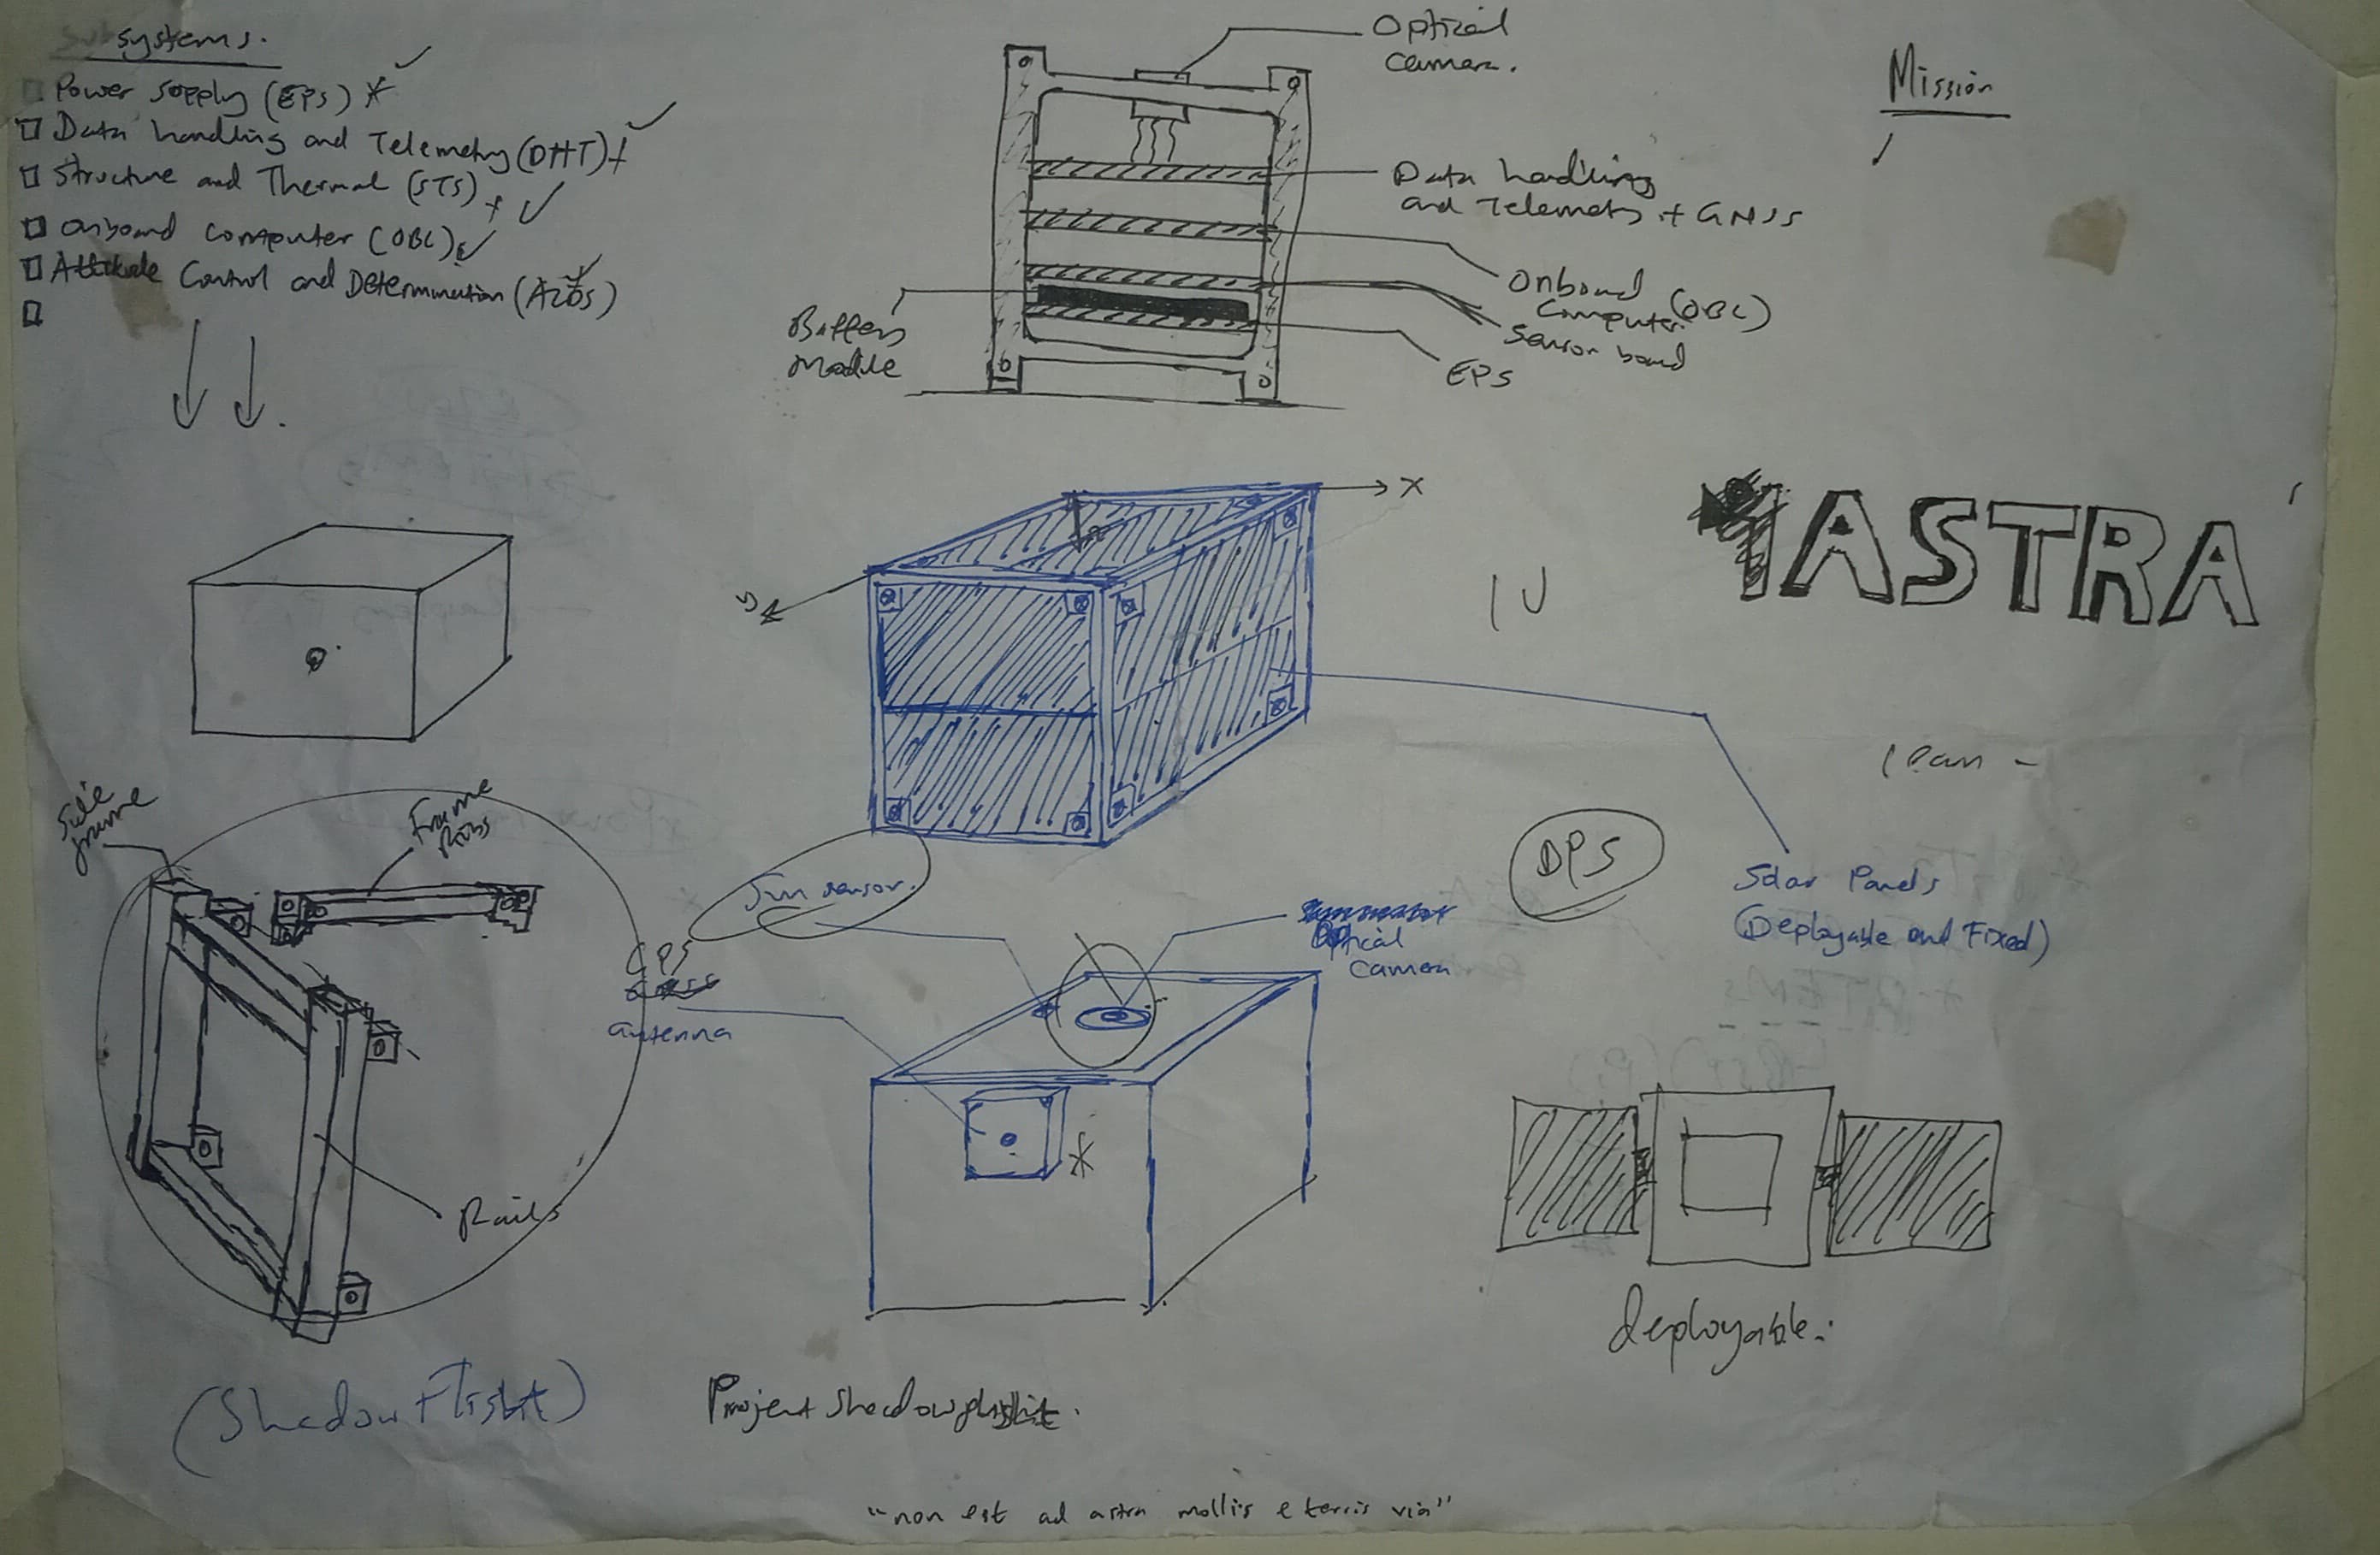
Intended Technical specifications
Enough of the stories. What would be the technical specifications of this project?
Well simple (on a high level) :
- All basic nanosat subsystems (Electronic power supply EPS, Attitude determination and control (ADCS), Sensor subsystem, Command and data handling (CD/H), Onboard Computer (OBC).
- Deployable solar panels (Tricky one but I will try get it working)
- 1U (10x10x10) cm dimension
- Mission: Earth observation using a basic Pi-Camera
- Ground control and simulation station
- Integration with standard deployers like PPOD (https://www.eoportal.org/other-space-activities/cubesat-concept#the-key-features-of-the-common-standard-are)
Now, I won’t go into details about the subsystems in this post, I will be deconstructing them as we go, as the sub-systems themselves are pretty involved. If you are more of a video person, you can visit my in-depth step-by-step design playlist on youtube here ( https://youtube.com/playlist?list=PLSQRKAY5h7mGCnkXsugdVSHa72dnC0zQU&si=Go6qBfVCc5woq3VH)
Conclusion
To conclude, I hope this article provides a nice written introduction to Project Shadow Flight and its early stages.
The project is open source on my Github (https://github.com/bytecod3/Project-Shadow-Flight), and I welcome contributors, sponsors, hobbyists, etc to contribute and build together.
Cover-image credits: https://spacemauritius.com/
Stay tuned for coming articles. See you around!